gathers & cuffs.
Part of learning to sew again means there are hiccups, re-dos and frustrations. It helps that the whole time there was a light at the end of the proverbial tunnel because every time I put the jacket on my dress form there was nothing but good things. I’m so glad I did a muslin first!
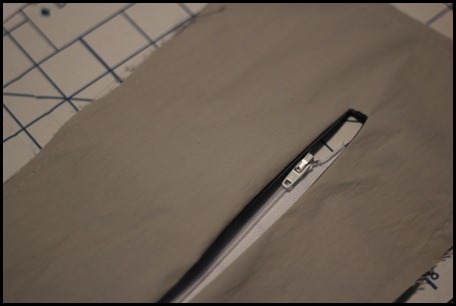
The first hiccup was the zipper in the collar. I don’t know what happened, but my zipper window came out about 1.5” longer than needed.
I had more than enough fabric to redo the collar and lining. The second time I measured twice and cut once:
Although my zipper window when finished was far from perfect, it looks ok and is not so bad that anyone would notice … unless they are closely inspecting the zipper in which case, they are probably standing too close :)
Hiccup #2 … Can you tell that my hood lining is darker than the collar lining? Yup. They are different polyester linings. One is slightly more purple, the other is bluer. I didn’t have enough of the main lining to line the hood as well. In my effort to use up my stash of fabric, yarn and various other things, I decided to use what I had rather than buy more. Now that the jacket is finished (yup, you’ll have to check back for the finished product), you wouldn’t be able to tell they are different unless again you are standing too close :) hehe
Not to give away too much for the finished project but I will mention the fabric I used. As you can probably see, it is quite stiff. It’s a water resistant polyester that was a bolt end at a local wholesale shop. I paid $9 per meter. After looking into it, I decided not to waterproof the seams since the fabric is only water resistant. The cost would not have been worth it! An idea for a future jacket I think …
While basting for the gathers I was having second thoughts about my fabric choice. I worried for no reason – it was perfectly fine. The fabric is a medium weight so the gathers were stiff and hard to even out but in the end, it was worth the added effort for the water resistance. There’s not point spending the time working on a jacket like this if it is not water resistant since it rains here a lot. Oh Vancouver … I both love and hate your weather patterns.
I chose not to interface the collar due to the stiffness of the fabric – I’m really glad I chose this route. The collar is soft but stands on its own perfectly. And I loooove the size. Very cool.
Lastly, the cuffs proved to be a little challenging in this stiffer fabric. I ended up re-doing them with 1.5” elastic instead of 2” – this made it easier to deal with when sewing them to the sleeves. It also proved to be helpful when I sewed on the lining using Sewaholic’s method rather than slipstitching by hand.
Check out that perfect match-up :) That you can stand too close to admire!
I shortened the sleeves by about 2” based on my muslin – I’m really glad I did. I have long arms but even these were a little too long for me.
Once we get some photos of the finished jacket, I’ll share. I hope your crafting is taking you on new adventures (and that no one is standing too close to see your ‘learning’ hiccups either)!


wow – this is so impressive! My sewing skills amount to very little, so I can't imagine doing a piece this awesome! Looking forward to seeing the final outcome :)
Thank you Jennifer! It's been very challenging to make but I really enjoyed it :)